Read the Revolution
Battle of Paoli
October 23, 2019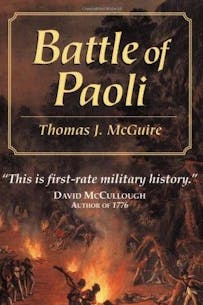
The Battle of Paoli, which took place overnight on Sept. 20-21, 1777, is remembered as one of the bloodiest battles of the Revolutionary War. Commonly known here in America as the “Paoli Massacre,” at least 53 Continental Army soldiers lost their lives and roughly 200 were wounded or taken prisoner during this surprise bayonet assault by about 1,200 British troops.
Thomas J. McGuire’s engaging book, Battle of Paoli, published in 2000, is one of the best accounts of the engagement. With numerous quotations from primary sources seamlessly woven into the narrative, Battle of Paoli launches the reader into the tense and frightening moments of the nocturnal clash in Chester County, Pennsylvania.
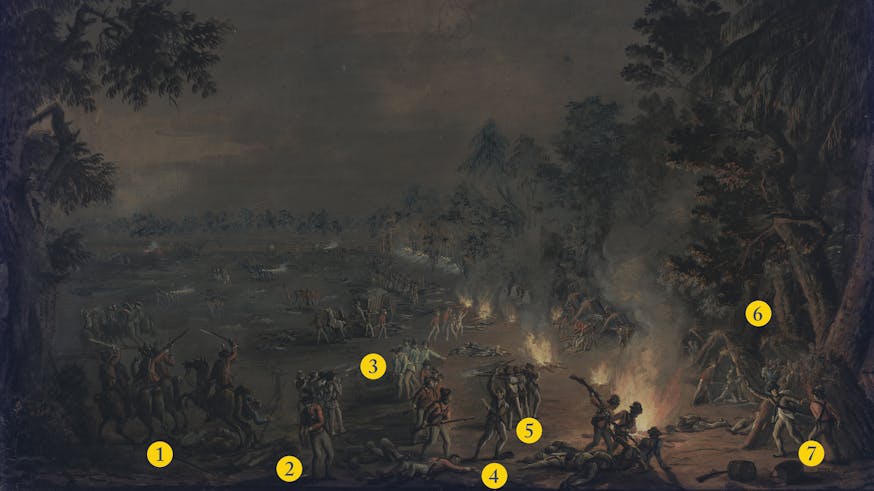
British Army Lieutenant Richard St. George, the primary subject of the Museum's Cost of Revolution: The Life and Death of an Irish Soldier exhibition, helped to lead the assault at Paoli. In 1782, he worked with Italian artist Xavier della Gatta to capture the drama and violence of the battle on paper, perhaps to preserve his memories of that night in Pennsylvania. You can see the original painting in the exhibition, reproduced on the cover of McGuire’s book, alongside other works of art created or commissioned by Richard St. George.
The following excerpt describes the British envelopment of Brigadier General Anthony Wayne's Pennsylvania troops during the early morning hours of Sept. 21. According to Lieutenant St. George, it was "a dreadful scene of havock."
Excerpt
Those soldiers who were able to keep cool heads and stay in platoon formation generally had a better chance than those who broke and ran. The nature of the attack was such that any disciplined, veteran troops might break and run under the same circumstances. The psychological impact of this tactic was calculated to take advantage of darkness and surprise so as to instill panic, confusion, and flight in the defenders. One result of the chaos was the perception that huge numbers of attackers were coming out of the dark. The next day Colonial Hartley wrote about these aspects of the attack:
"Fortune has not been sublime to our Division-The Enemy last Night twelve oClock, attacked our little Force with about 4000 Men–Horse and Foot–accompanied with all the Noise and Yells of Hell–Our Division was drawn up, but retreating... the Impetuosity of the Enemy was so great–our Men just raised from Sleep, moved disorderly–Confusion followed...The Carnage was very great...this is a Bloody Month."
The 2nd Brigade, at the front of the column, was still not moving when the British light infantry hit the rear of the 1st Brigade. Wayne had ridden ahead to locate Colonel Humpton, commander of the 2nd Brigade, to find out what the problem was and why his orders were not being carried out.
Some of the British light troops surrounded the 7th Pennsylvania, while others went in pursuit of the 1st Pennsylvania and those from the column who broke ranks and ran in panic. Hartley’s Additional Continental Regiment, the unit ahead of the 7th, was also attacked. Some Continentals loaded and fired by platoons, while hand–to–hand fighting erupted in spots.
The British had the advantages of surprise, momentum, and skill, in addition to all being equipped with bayonets. Hartley described the scene:
"The Seventh Regemint having no Front towards the Enemy as well as my own Regiment–were attacked in their flank and Rear & tho’ there were attempts made to form the that it was impracticablenor could they retreat regularly, as the left wing had been so long a Moving. Confusion followed–Several men fell on both sides–the Troops in the Rear pressed on those in Front & the Passage on the Left being narrow sacrificed Many of the Troops."
The “Passage on the Left” refers to openings in the fence on the Bown–Pearce property line at the left side of camp, though which the column was moving out. By piecing together the various accounts, it becomes clear that there were three separate fileds and three fences specifically involved in the main battle. The circumstances indicate that these fences were stout, well made, and not easily pulled down. Some pushing and shoving occurred as those in the rear of the column tried to get through the fence openings, only to be blocked by those in the middle who were not able to move ahead because the front was for some reason still standing firm.
A sudden thunderous roar, with loud shouts and a trumpet blast, announced the second wave of attackers. With sabers drawn, the dozen troopers of the Queen’s Own Light Dragoons swept across the camp and swarmed around the rear of the shaken 1st Brigade, instilling even more panic. Lieutenant St. George of the British light infantry described “a dreadful scene of HavockThe Light Dragoons came on sword in Hand[.] The Shrieks Groans Shouting, imprecations The Clashing of Swords and bayonets &c &c &c … was more expressive of Horror than all the Thunder of the artillery &c on the Day of action.” Three–foot–long saber blades flashed in the firelight, cutting men down and cutting them up. Drum Major Daniel St. Clair of Hartley’s Regiment suffered a number of grievous wounds, the nature of which suggest that he was cut up at close quarters by someone on horseback. St. Clair received multiple slashes on his body and head, and lost his left eye and all the fingers on his left hand. The loss of his eye and fingers further suggests that he put up his left arm in a vain attempt to ward off a sword blow to the head.
Immediately behind the British dragoons came the 44th Regiment of Foot. Another loud “Huzza!” rang out, another wall of over 300 bayonets poured out of the woods, another wave of panic swept the stalled column. This attack headed more toward the camp itself, as the rear of the column, already surrounded by the light infantry, further disintegrated or sporadically moved ahead. Royal Engineer Captain Montrésor wrote, “they rushed in and put the whole of the picket to the bayonet and then huzza’d which further alarmed the main body, however our troops rapidly advanced on their left, which were chiefly in their wigwams.” The 44th and the Queen’s Own Dragoons moved through the camp to the left of the column and toward the fence on the Bowen–Pearce property line, all the while seizing opportunities to strike at the column and at stragglers fleeing though the camp or into the woods behind it. The chaos of the moment is revealed in Colonel Hartley’s description of the phase of the battle:
"After we had gone 200 or 300 yds several Attempts were made to rally the Men-but the Enemy pressing so close upon the left of the Retreat, which was chiefly my Brigade & so many Interuption of Fences that it was impossible to rally Any Men ‘till we had got to some Distance from the Enemy–The Men were extremely intimedated with the Noise of the Enemys Horse[.] At the Fences considerable opposition was made by some of the best Men-but many of them suffered."
The 1st Brigade finally pushed through the narrow passage on the left. Some companies formed a battle line along the back side of the fence to cover the withdrawal, while others hurried on in the dark past the 2nd Brigade, which was even yet standing still. Maintaining organization was extremely difficult due to the darkness and confusion, but many officers valiantly exerted themselves in trying to rally and reorganize their troops. In the midst of this fighting, Lt. John Irwin of the 2nd Pennsylvania fell, seriously wounded. At the first alarm, he had stuffed his company orderly book into his waistcoat. Now, his “life was saved by means of this book. It was in his bosom, and received many bayonets thrusts. He was left for dead on the field.”
Why was the 2nd Brigade not moving? Wayne later testified that “owing to some Neglect or Misapprehension (which is not uncommon) in Coll Humpton–the Troops did not move until a Second and third Order were sent altho’ they were wheeled and faced for the purpose.” Until recently, this statement was the only firsthand refence to the halt in print, and it is recrimination rather than an explanation of what happened. Humpton’s description of the situation, heretofore unknown, has come to light from his testimony:
"The Brig[a]de was form’d in as short a time as possibleat least I saw no delay, they remain’d form’d a few Minutes waiting for orders–the Artillery & waggons was driving very fast along our left flank [the back of the camp], being at that time form’d in platoons to the left, as the Artillery & Waggons greatly incommoded Us either for Action or a retreat I rode to the Left of the Brig[ade] to see if the Fences were down and found a great stopage near the Left of the fourth Regt–… Our Artillery & Store Waggons had very little Noticeno Fences laid down or the least preparation made for a sudden retreat."
When later asked by Wayne, “Do you Remember whether the Division moved one mile & a half to the left the evening of the 19th, and whether the Fences were down in the Direction,” Humpton admitted that he did, “the evening before the attack, & that the Fences were put down for the wagons & ye rear of the Division but the Front march’d in the road.” In other words, the infantry column started moving out by the left front of the camp when the artillery, parked on the right, was ordered to evacuate. The four cannons, followed by the wagons, immediately took off toward the left along the treeline at the back of the camp and through some openings in the Bowen–Pearce fenceline at the left rear. Outpacing the infantry, they drove through other fences (the openings made the previous night) and onto Sugartown Road, where they flew up the road just as the head of the infantry column arrived at the same place. The column halted to let them pass.
Just across Sugartown Road, Col. Adam Hubley “fell in with one of our field pieces (the carriage of which had lost the hind wheels). In the haste of retreat, the jarring and bouncing of the speeding cannon knocked the wheels off the carriage. The artillery piece broke down in the middle of the road and caused the wagons to jam up behind it, effectively blocking the infantry’s escape route for several minutes. By the time Hubley reached this cannon, it had been dragged off the road into a field west of Sugartown Road; the damage was serious enough to prevent reassembly. Wayne wrote to Washington that “one of the Pecies met with Misfortune near the field of Action which Impeded us a Considerable time,” a statement that directly contradicts his later sworn testimony that Humpton’s neglect was the cause of the halt.
Lt. Col. William Butler’s 4th Pennsylvania Regiment was at the head of the column. From their perspective facing Sugartown Road, the soldiers of the 4th had a thick and very dark strip of woods on their right (no campfires in this area), a fence–lined road in front blocked by a stalled train of cannons and ammunition wagons, with commissary and quartermaster wagons on their left all the way back into camp. The column was trapped, momentarily preventing further orderly movement. One can well imagine the scene that night: shouting officers, swearing artillerymen, skittish horses, and frantic civilian teamsters. Aides rode.
Read the Revolution is sponsored by The Haverford Trust Company
Read the Revolution is published biweekly by the Museum of the American Revolution to inspire learning about the history of the American Revolution and its ongoing relevance.
Sign Up
Get biweekly Read the Revolution featured excerpts right to your inbox.
Tags
Learn More
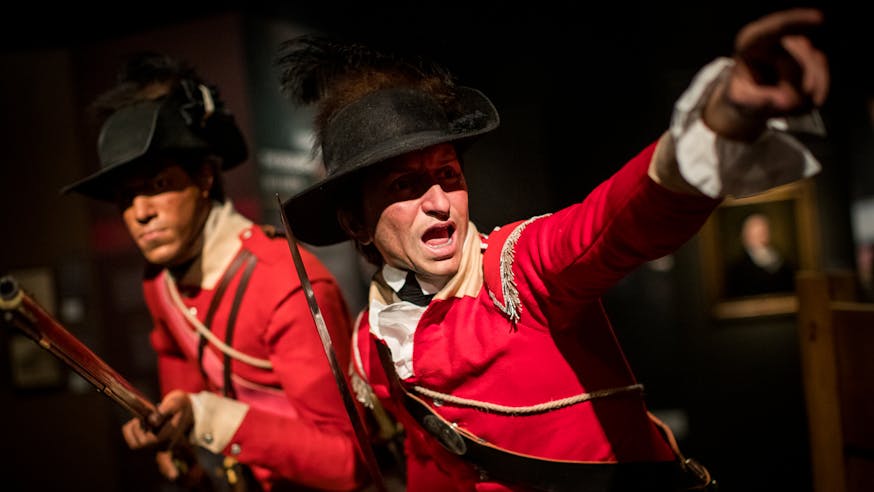
Cost of Revolution: The Life and Death of an Irish Soldier
September 28, 2019 - March 17, 2020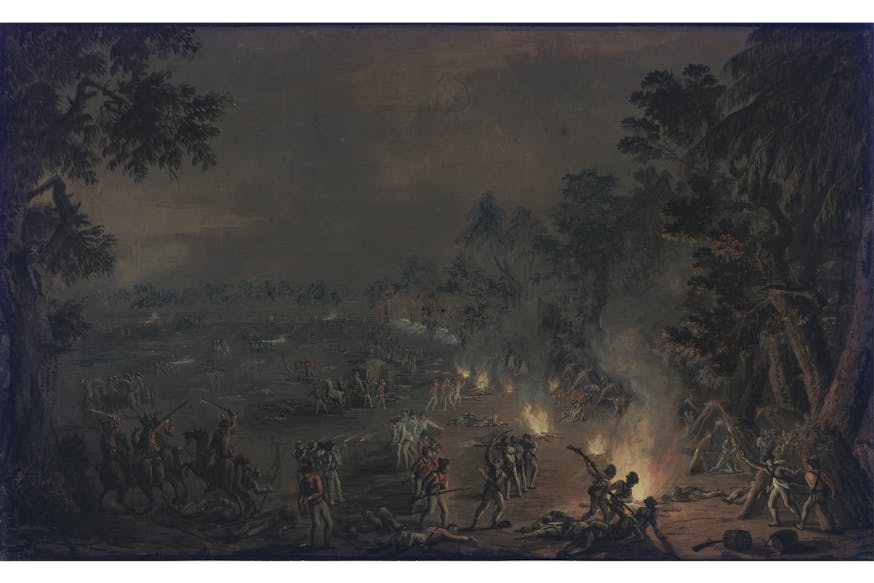
Battle of Paoli