Read the Revolution
Mapping the Revolution
June 8, 2016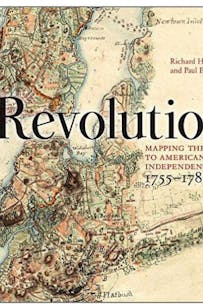
Purchase the book from Barnes & Noble.
Through a collection of sixty historic maps, Richard H. Brown and Paul E. Cohen's Revolution: Mapping the Road to Independence 1755-1783, charts the shifting territorial claims and geographic strategy behind military campaigns from the Battle of Fort Duquesne at the start of the French and Indian War (1755-63) to the Siege of Yorktown at the end of Revolutionary War.
The following excerpt features maps from the Battle of Bunker Hill, also known as the Battle of Breed's Hill.
Excerpt
John Montrésor was the most able British soldier who served during the French and Indian War and the American Revolution. His tour of duty in America lasted twenty-three years, from 1755 to 1778-with one exception, longer than any other British engineer. 'He had greater ability than any of the generals under whom he served,' wrote the historian Kenneth Roberts of Montrésor, 'and if he had commanded British troops in America, the Revolution would have ended in 1776.' Montrésor was at Lexington and Bunker Hill and on Long Island as well as in Philadelphia, and some of the finest maps of the Revolution were drafted by him. He drew as many as two thousand maps while in America and many were published. Illustrated here (see Map 1) is his Draught of the Towns of Boston and Charles Town and the Circumjacent Country Shewing the Works Thrown up by his Majesty's Troops and also Those by the Rebels during the Campaign 1775 . This manuscript map from the time of the Battle of Bunker Hill was made for Lord Percy and is still in Alnwick, his vast castle in Northumberland.
After the encounters at Lexington and Concord (April 19, 1775) the British and the rebel colonists were on an accelerating collision path. As tensions in Boston increased exponentially, there was the call to the surrounding colonies for troop reinforcements. The military population in the city began to swell as companies arrived in Boston from New Hampshire and Rhode Island as well as a regiment from Connecticut under the command of Brigadier General Israel Putnam. One factor in the looming confrontation was obvious to both sides: whoever controlled the high ground on either nearby Dorchester or the peninsula of Charlestown would hold the strategic advantage. On June 13 intelligence reached the rebels that the British intended to occupy Dorchester Heights, and on June 15 the Massachusetts Committee of Safety decided to make a countermove by occupying Bunker Hill, an elevation on Charlestown, the peninsula directly across the water from Boston.

General John Burgoyne described the military circumstances in a letter to his nephew Lord Stanley: 'Boston is a peninsula, joined to the main land only by a narrow neck, which on the first troubles Gen. Gage fortified; arms of the sea, and the harbour, surround the rest: on the other side one of these arms, to the North, is Charles-Town (or rather was, for it is now rubbish), and over it a large hill, which is also, like Boston, a peninsula.' Although the ensuing battle is named after Bunker Hill, most of the fighting took place on Breed's Hill. This elevation was nearer to Boston but not as high as Bunker Hill and was strongly preferred by Putnam; it would not take the rebels long to discover that this eminence did not possess as strong a tactical position.
On the evening of June 16, 1775, a patriot force of twelve hundred under the leadership of Colonel William Prescott had silently marched from Cambridge and crossed that narrow neck of land onto the peninsula of Charlestown where they built a square redoubt on Breed's Hill (each side measuring about 45 yards) and then braced themselves for the British to respond. In the early morning light of the next day, an adumbration of the redoubt came into the view of the early risers on board the British sloop Lively , at the ready in Boston Harbor. The British had planned for this action. They had built fortifications and armaments within the city of Boston, including the Cobb's Hill battery with its eight 24-pound guns and a redoubt on Beacon Hill that was armed with two 12-pounders. John Montrésor was in a good position to delineate these works on his maps for he had designed many of them himself They are accurately located on his map, as is the 'Circumjacent Country' around Boston Harbor. While Montrésor's map shows the general battleground, it is a manuscript map in the Faden Collection at the Library of Congress that focuses on the peninsula of Charlestown and shows 'the Action which happened 17th June 1775.' (see Map 2)

This spirited manuscript is identified on its verso as the work of Thomas Hyde Page, a British lieutenant who fought in the battle and was severely wounded. He received a grant of ten shillings a day for life as a result of the wound. Page's map shows the American and British lines and indicates the various movements made by the troops. Also noted are several British naval ships including armed transports, floating batteries, and His Majesty's ships Glascow, Somerset , and Lively , whose watchful sailors had been the first to notice the rebels' redoubt. Cannonfire from the Lively signaled the beginning of warfare with the American forces, but this initial attack on the peninsula did not damage the sturdy redoubt that the Americans had constructed in the darkness of a single night.
The high tide that General William Howe needed to land his two thousand British infantrymen on the peninsula did not come in until the early afternoon so his debarkation was delayed, thus providing the defenders of the hill more time to anticipate the battle. They had built, in addition to the redoubt, a defensive line of fence rails. Once on land, the British soldiers followed Howe's order to divide into two distinct units. Brigadier General Robert Pigat attacked the redoubt while the other unit, under Howe himself, attacked the area where the rail fence had been constructed. The letter A on the map shows the position of the British as they launched their first attack. It was a predictable frontal attack that did not catch the rebels off guard.
Among the problems the British faced was a simple matter of ammunition. They had transported 6-pounders to Charlestown, but the extra ammunition they had mistakenly brought was for 12-pounders and therefore useless. The infantrymen were also limited by their hundred-pound knapsacks, which slowed their progress. Many of the pictures of the battle show the peninsula in flames as the encounters took place. Indeed, Howe had ordered Vice Admiral Samuel Graves to fire 'hot shot' from the ships to set the dry fields ablaze. Smoke billowed over the landscape as the two forces battled. The rebels, primarily New Hampshire men under the command of John Stark, repelled the aggressors. The retreating British troops were in a state of stunned disbelief How could this ill-trained, undisciplined army of rebels repel the regulars of the greatest army on earth? After that first assault the rebels started to run low on ammunition, a disadvantage they frequently encountered throughout much of the war. Shortly after retreating from Breed's Hill, the British attacked a second time. Using their remaining gunpowder as economically as possible, the rebels held their fire until the British were almost on top of them. When they were within firing range, the Americans ferociously defended their position, causing numerous casualties among the attackers. Bayonet warfare concluded this second assault, making this retreat even bloodier than the first. 'There was a moment,' Howe later wrote about the battle, 'I never felt before.'
The British held a strong advantage when they began their third assault on Charlestown. First of all, they had four hundred fresh troops and the colonists were all but defenseless. And while the colonists had nearly run out of ammunition, the British had brought ammunition that was compatible with their field pieces. As the redcoats advanced on Prescott's redoubt, the Americans used the last of their ammunition to slow their progress. Major Pitcairn was called into service to conclude the battle, which lasted some two hours, and he was mortally wounded in this exchange. This time the Americans were forced to retreat. After fire broke out Prescott fell back from the redoubt he had built the night before. The British had held their ground and won the battle, but it was a Pyrrhic victory. They suffered over a thousand killed and wounded or nearly half of the force engaged. American casualties were estimated at 450 killed and wounded, including Dr. Joseph Warren, the president of the Massachusetts Provincial Congress. Afterward, the British general Henry Clinton remarked in his diary that 'A Few more such victories would have surely put an end to British dominion in America.'
Read the Revolution is sponsored by The Haverford Trust Company
Read the Revolution is published biweekly by the Museum of the American Revolution to inspire learning about the history of the American Revolution and its ongoing relevance.
Sign Up
Get biweekly Read the Revolution featured excerpts right to your inbox.